
I get really annoyed when people (read magazines) post photo editing tutorials which reads: "Try this at home for free" or "Photo editing on a shoe-string" and later refers to Photoshop specific tools. Photoshop CS4 will set you back 7912 DKK (£920, $1351 or €1065), which is a lot. And this assumes you have got Windows or OS X. When I say free I mean free (well you have to pay for the computer and a camera, of course) so let's roll.
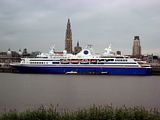
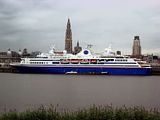
Pictures often look very plain and boring if you have a gray sky. The problem is that usually there isn't happening much, contrast wise, in the sky. But there are ways to enhance detail between gray and gray and get more interesting pictures, sometimes even stunning (the example pictures aren't stunning I know). For this tutorial you need the latest version of Paint.NET or download the Curves+ plug-in.
- Open your picture in Paint.NET or GIMP.
- De-noise the image if necessary (In Paint.NET: Effects>Noise>Reduce Noise and in GIMP: Filters>Enhance>Despeckle)
- Adjust the overall contrast and saturation settings to your liking (In Paint.NET: Adjustments>Hue/Saturation and Adjustments>Brightness / Contrast and in GIMP: Colors>Hue-Saturation… and Colors>Brightness-Contrast…)
- Select the sky, since it is uniform use the Wand tool to select it (if it selects too much use the top slider (in the left dock when using GIMP), which is set to 50% by default (15 in GIMP), to decrease the percentage and increase if it selects too little)
- With the sky selected go do Adjustments>Curves+ (in GIMP: Colors>Curves…).
- What you'll see is a diagonal line and a histogram of your selection. By default it is set to Luminosity. The Curves+ window can be resized and I recommend making it bigger so you can see the histogram clearly.

- Lock the diagonal line (by clicking on it) where the histogram starts and ends (use the vertical lines as a guide).
- Lock the line in the middle of the two points you locked in the previous step. Click to the left of the middle point and slightly lower it (this makes darker parts darker).
- Click to the right of the middle point and slightly increase it (this makes lighter parts lighter).
- You can adjust the new curve by clicking and dragging a locked point around. Remember to keep an eye on your picture and don't overdo the effect, it quickly looks fake or edited. Also keep an eye on the foreground to see if the brightness of the sky matches.
- When you're happy with the effect click OK, and press CRTL+D to deselect (Update1: In GIMP use CTRL+SHIFT+A to deselect)


The reason we don't use the Brightness / Contrast in this situation is that we can adjust which gray tones should be lightened and which gray tones should be darkened. Curves+ is by far the best plug-in in Paint.NET so be sure to play around with it. Use the RGB mode to enhance colours (only in Paint.NET), invert luminosity while keeping the original colours (drag the ends of the line to the opposite sides) are some things you can do with ease using Curves+ (only in Paint.NET).
My last example picture was quite boring until I retouched it. Of course it is easier to do this kind of editing if you shoot in RAW as all information is saved. If you shoot in JPEG you will find that some images cannot be fixed as there isn't enough information to work with.
3 comments:
Deselecting in Gimp is ctrl+shift+a :]
Thank you for that valuable tip, Elsa! I really should read the help file :D
Paint.NET 4.2.1 + Portable Professional Image Editing Free Download
Post a Comment