
Not too long ago I was introduced to HDR (High Dynamic Range) photography; a fun and inspiring technique which can, if done properly, give mind blowing results. When you create a HDR you merge a bunch of images with different exposures which results in one picture with a wider range of colours and luminosity, which could not have been created in one picture (unless you shoot in RAW and tweak around a bit). After reading an article on an interesting technique where you merge photos with different focus in this month's issue of Practical Photograpy I decided to try it out. The focus stacking technique is brilliant and here is how you do it:
- Take your camera and put it in manual focus mode (if you have a function dial you can probably find this setting when it is turned to P (program mode), M (manual mode) or something similar; if unsure consult the instructions book that came with your camera).
- Put your camera on a tripod or anything that will prevent the camera from moving around.
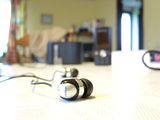
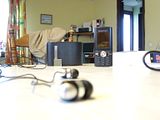
- Take your first image with your foreground object in focus.
- Take another image where something else important is in focus.
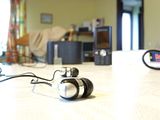
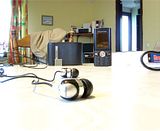
- Take some more photos continuously moving your focus further from the camera.
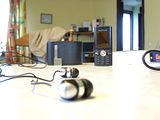
- It is important that the focus goes from macro to micro (close -> further away).
- Download CombineZM and install it. It will run (according to forums) smoothly on a Linux machine using Wine. I don't know if there exists a program like CombineZM for Mac OS X. Update1: On the Focus Stacking Wikipedia page there are some programs listed for focus stacking. Check it out. Those who are afraid of spiders don't check it out.
- Open up CombineZM and in the main (large) window click: File>New.
- Select all the images you wish to include in the final image. Check if the file name of the photo is still the original one, assigned by the camera. This is important since the program uses the numbers in the filename to see which photo comes first, second etc.
- Go to Macro>Do Stack or press Shift+F1. You can follow the progress in the CombineZM Progress window.
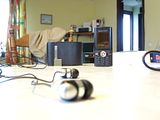
- Prepare to be amazed. The image (usually) looks great and resembles those taken with lenses that can handle really large F-numbers.


All credit to Practical Photography for inspiring me and to Alan Hadley for programming CombineZM, which is completely free. Next: How to shoot star trails.
4 comments:
Well your article helped me terribly much in my college assignment. Hats off to you enter, will look forward for the duration of more related articles soon as its sole of my choice topic to read.
Sorry for my bad english. Thank you so much for your good post. Your post helped me in my college assignment, If you can provide me more details please email me.
Thank you! I will gladly e-mail you if you want more information but I don't have your email address. You can mail me at: ruben.la.clae@gmail.com.
Paint.Net Mac : Paint.Net for Mac like MyBrushes, Pinta, and GIMP are some equivalents digital artists can choose to use Paint.Net Mac.
Post a Comment