
Step 1 (selecting a photo):
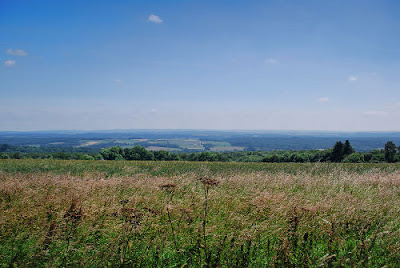
Open up a photo. I will use this one for demonstration (shot in Belgium, next to unkown road from Rochefort):
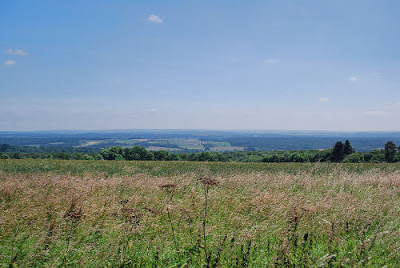
As you can see, it is a plain looking photo. It is a good photo (exposure-wise) but it doesn't pop, like the photos you see posted on Flickr. But we can fix that...
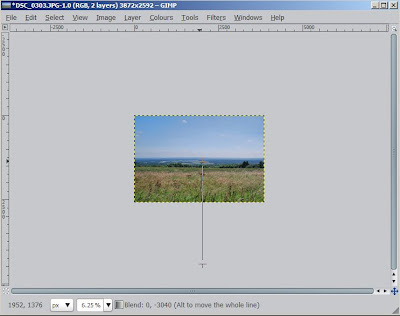
Step 2 (create a lower gradient):
In GIMP, add a new layer and rename it if you feel like it. Select the Gradient Tool in the Tool Box (pressing L is the keybord command). Select the foreground colour as black and the background colour as white (it is automatically set to this by default). Drag a gradient from outside the picture, to somewhere close to the horizon (pressing the CTRL-key will make the gradient tool "snap" to preset angles, such as 90 degrees).
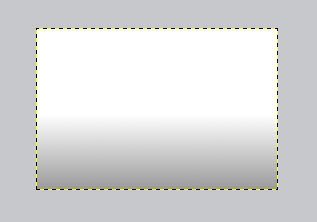
The result will look like this:
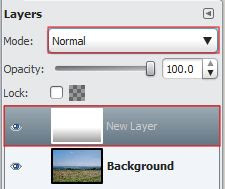
Step 3 (change the blend mode):
In the Layer Tab (where your different layers are shown), select the newely created layer and change the blending mode to Burn.
The result might shock you but don't worry. Adjust the opacity slider until the picture looks normal:

At 51%, I was pretty happy.
Step 4 (create upper gradient etc):
Repeat steps 2 and 3 but for the upper gradient.
This is my final image, which looks much more interesting than my original:
You can use the Burn Tool as an enhancer in many different images. So with this tutorial I encourage you to try out your own different styles. Enjoy!
No comments:
Post a Comment